
You’re probably used to seeing handstands and handstand variations (think: handstand shoulder taps #casual) in your TikTok feed by now. Learning how to do a handstand is not only an impressive party trick—it will score you heaps of mental and physical bennies, too.
“To do a handstand, your strength, mobility, balance, focus—everything—has to be aligned for you to achieve that completely weightless feeling,” says Nadia Zaki, yoga teacher and founder of Constantly Evolving and Inspire Inner Space in New York City. Zaki notes that this should not intimidate you. “Anybody, at any size, can do a handstand,” she assures.
In this article, you’ll learn all about:
- The benefits of going upside down
- The muscles worked in a handstand
- How to warm up before doing a handstand
- Step-by-step directions for doing a handstand
- Common handstand mistakes to avoid
As for how long it’ll take you to master a handstand? It’s pretty individual. Some will get it right away, while it takes a lot longer for others. Remember that it’s as much a mental discipline as a physical one and keep trying, knowing that you will get there.
The Benefits Of Handstands
- They make you feel invincible. “To be able to hold a handstand, you feel like you can conquer the world,” says Zaki. That carries over into the rest of your life, helping you make bolder decisions around your career, for example.
- They’re like natural coffee. Inversions like handstands get the blood circulating and give you an energy boost. Zaki includes handstand practice in her 7:30 a.m. classes for that reason—they just wake you up.
- They work every muscle group. Specifically, handstands target your core, shoulders, triceps, biceps, and back muscles but your legs (especially hamstrings) also get in on the action, Zaki notes.
- They make you more mobile. “There’s so much mobility that has to be in the hips and the shoulders to achieve this pose,” Zaki says.
How To Warm Up For Handstand Practice
Now that you’re convinced to flip upside down, do not skip the warm-up. “You might put too much pressure on your wrists or pull a hamstring,” Zaki cautions.
Try These Warm-Up Moves:
Hamstrings: Downward Dog with knees bent
Wrists: Figure-eights
Shoulders: Shoulder CARS
Core: Planks and Mountain Climbers
Back: Cat-Cow
You can also flow through Plank, Chaturanga, Up Dog, and Down Dog a few times.
How To Do A Handstand
Zaki recommends beginners use a wall to get comfortable going upside down. Follow these five steps from Orly Mallin, a yoga instructor at New York Health & Racquet Club.
Watch gymnast Gabby Douglas teach our fitness editor what makes a handstand work:
Step 1
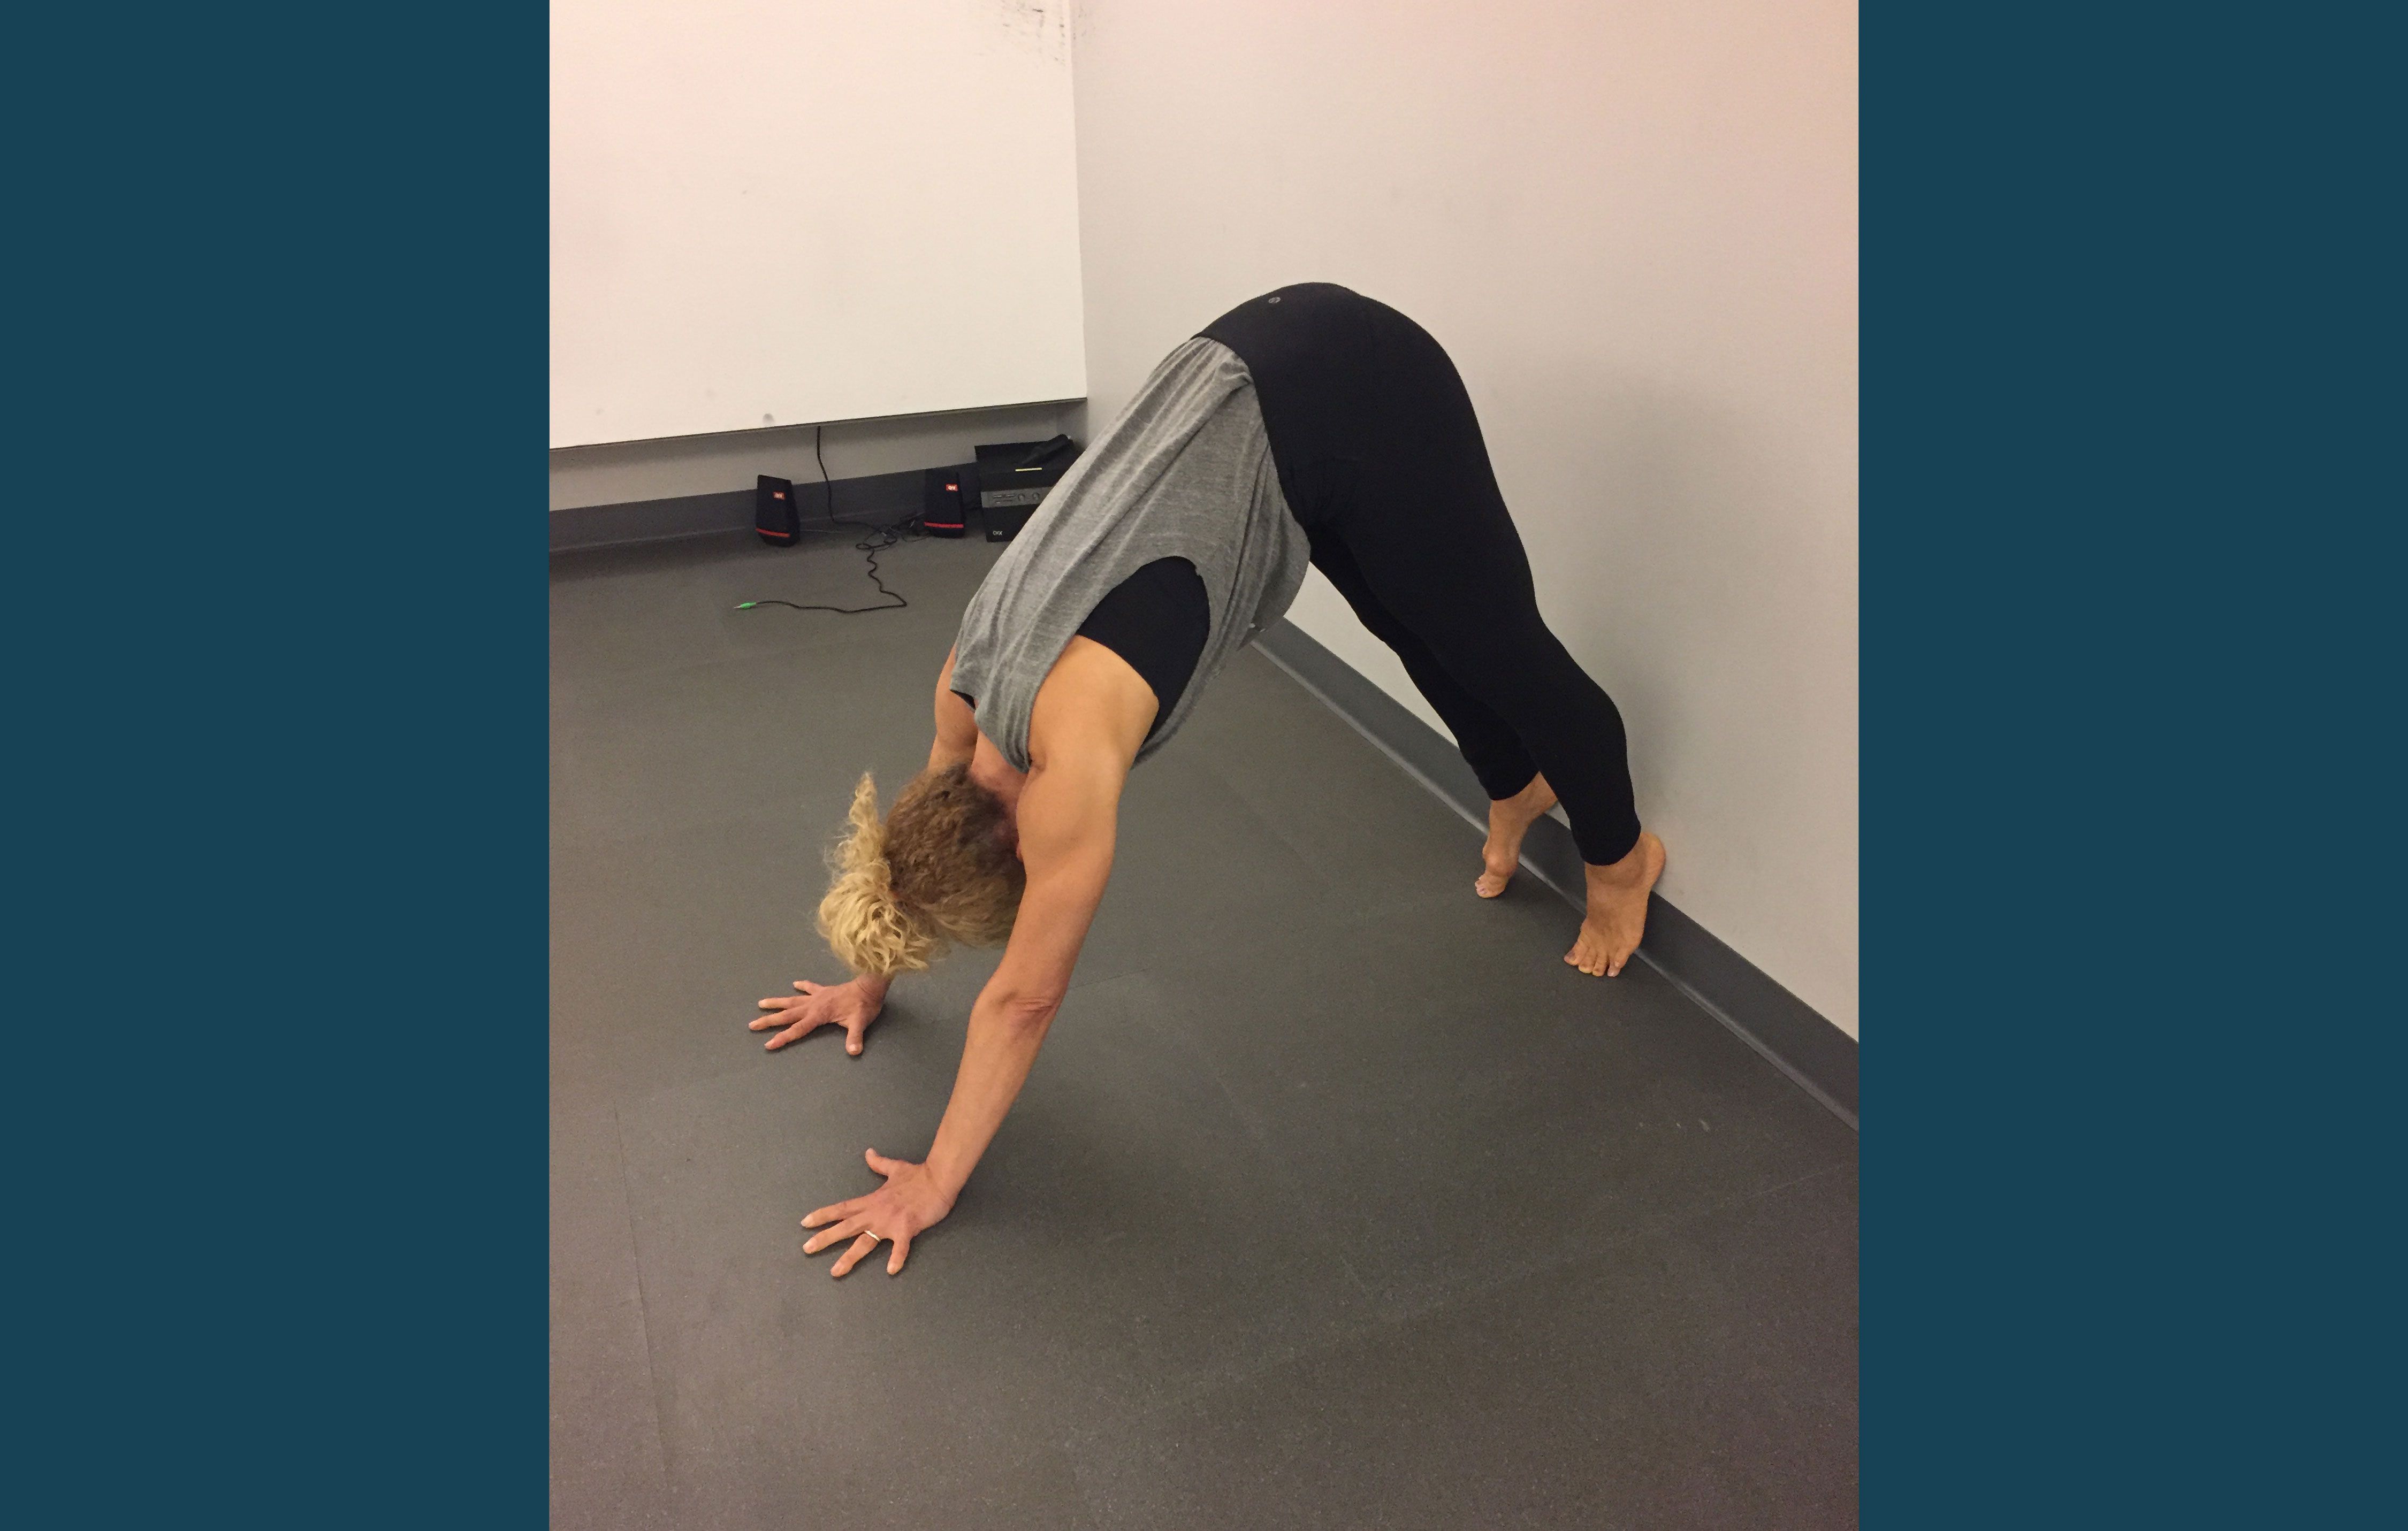
First things first, take your starting position. Sit down on the floor, facing the wall, and press your feet into the wall. Note the distance. Then flip over, and place your hands where your butt was, and your feet just in front of the wall. Your hands should be shoulder-width apart with fingers spread, and rotated forward, not inward. Essentially, you’re in a downward-dog position. From here, practice distributing all your weight to the front of your feet, until you’re on the tips of your toes.
Step 2
Next, start to slowly walk your feet up the wall behind you, with bent legs. Be sure to press more weight into your hands, and your whole foot into the wall. If your arms feel strong enough to handle the weight, keep walking up the wall, activating your arms, shoulders, upper chest, and core as you do so.
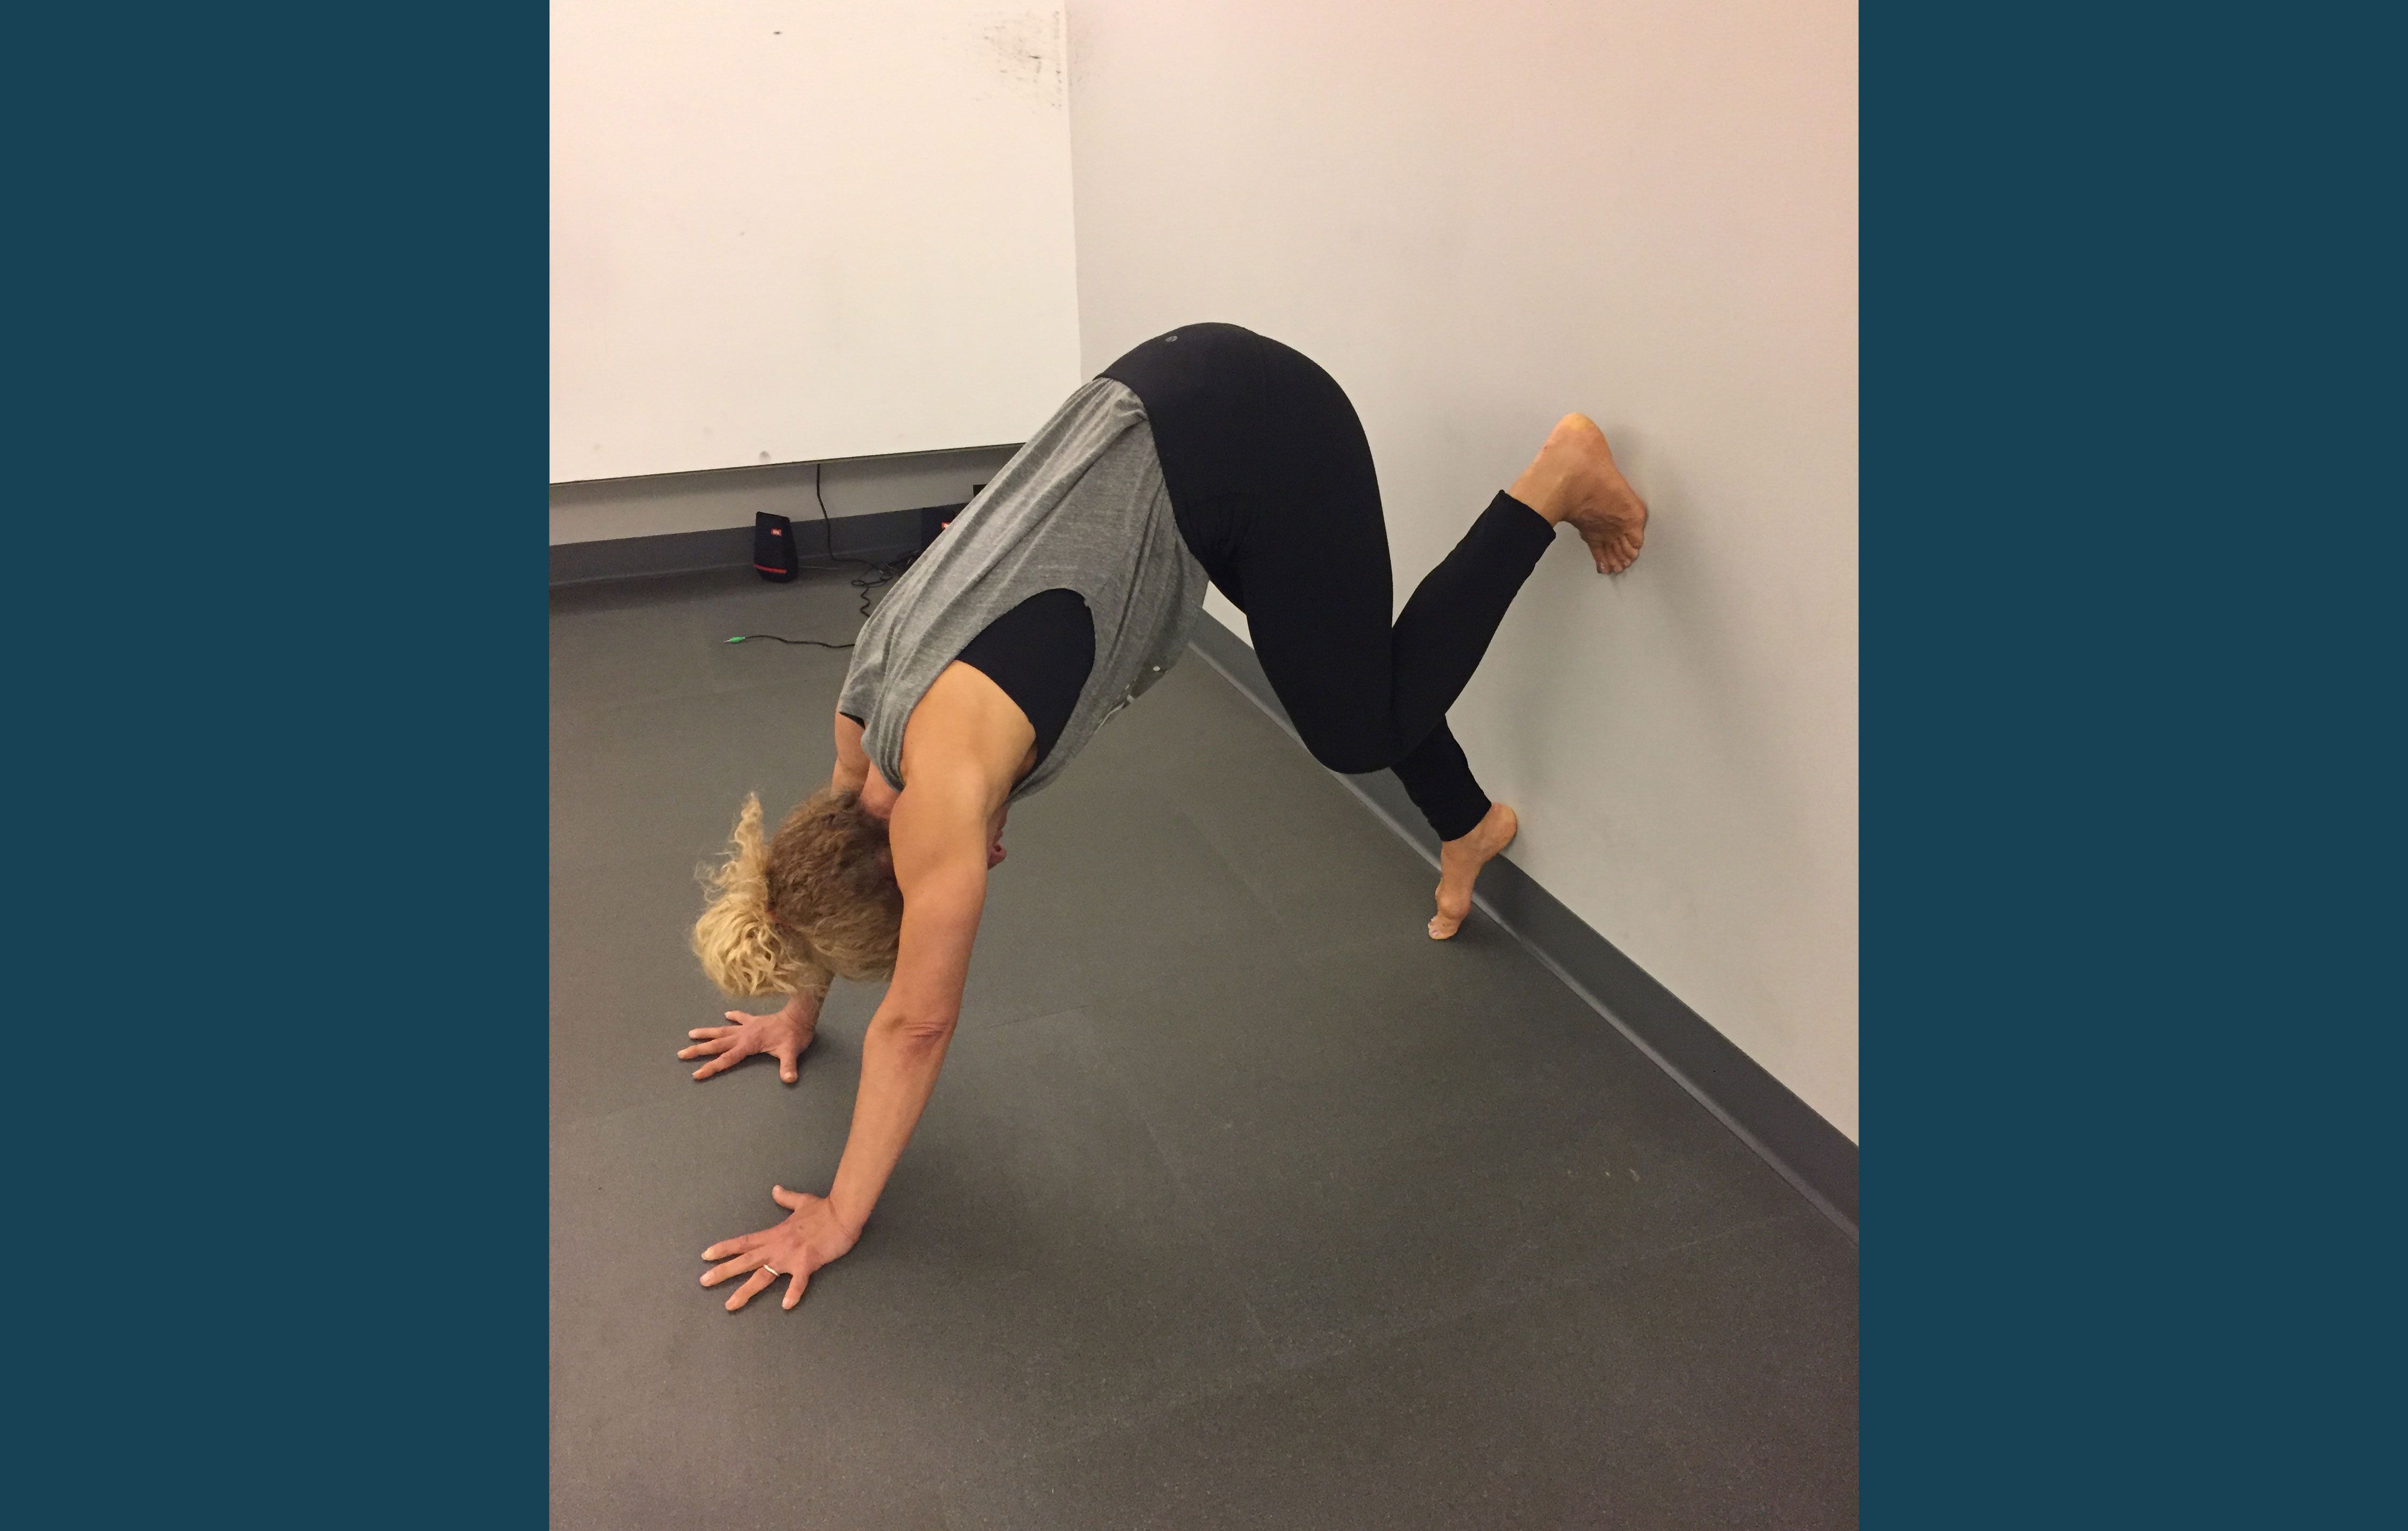
Step 3

Continue practicing walking up the wall until you feel confident, stable, and strong. Make sure you aren’t hyperextending your elbows—keeping a slight bend limits the impact on the arm joints and also prevents the arms from caving in. Stabilize your entire body by pulling in your abdomen and engaging your core. To prevent your shoulders from coming up to your ears, lift from your lower belly. Your legs should always be engaged.
Little by little, walk your feet up the wall until your body makes a right angle, with knees slightly bent.
Step 4
Next step: lifting up those legs. Begin by lifting one leg up. Make sure your legs are rotated slightly inward—this helps keep the position of the spine vertical. And don’t forget about your feet! They can be pointed, flexed, or a combination of both called “Barbie doll” feet, a.k.a. pointed feet with toes flexed back. Activated feet help to engage the entire body, just like standing upright.
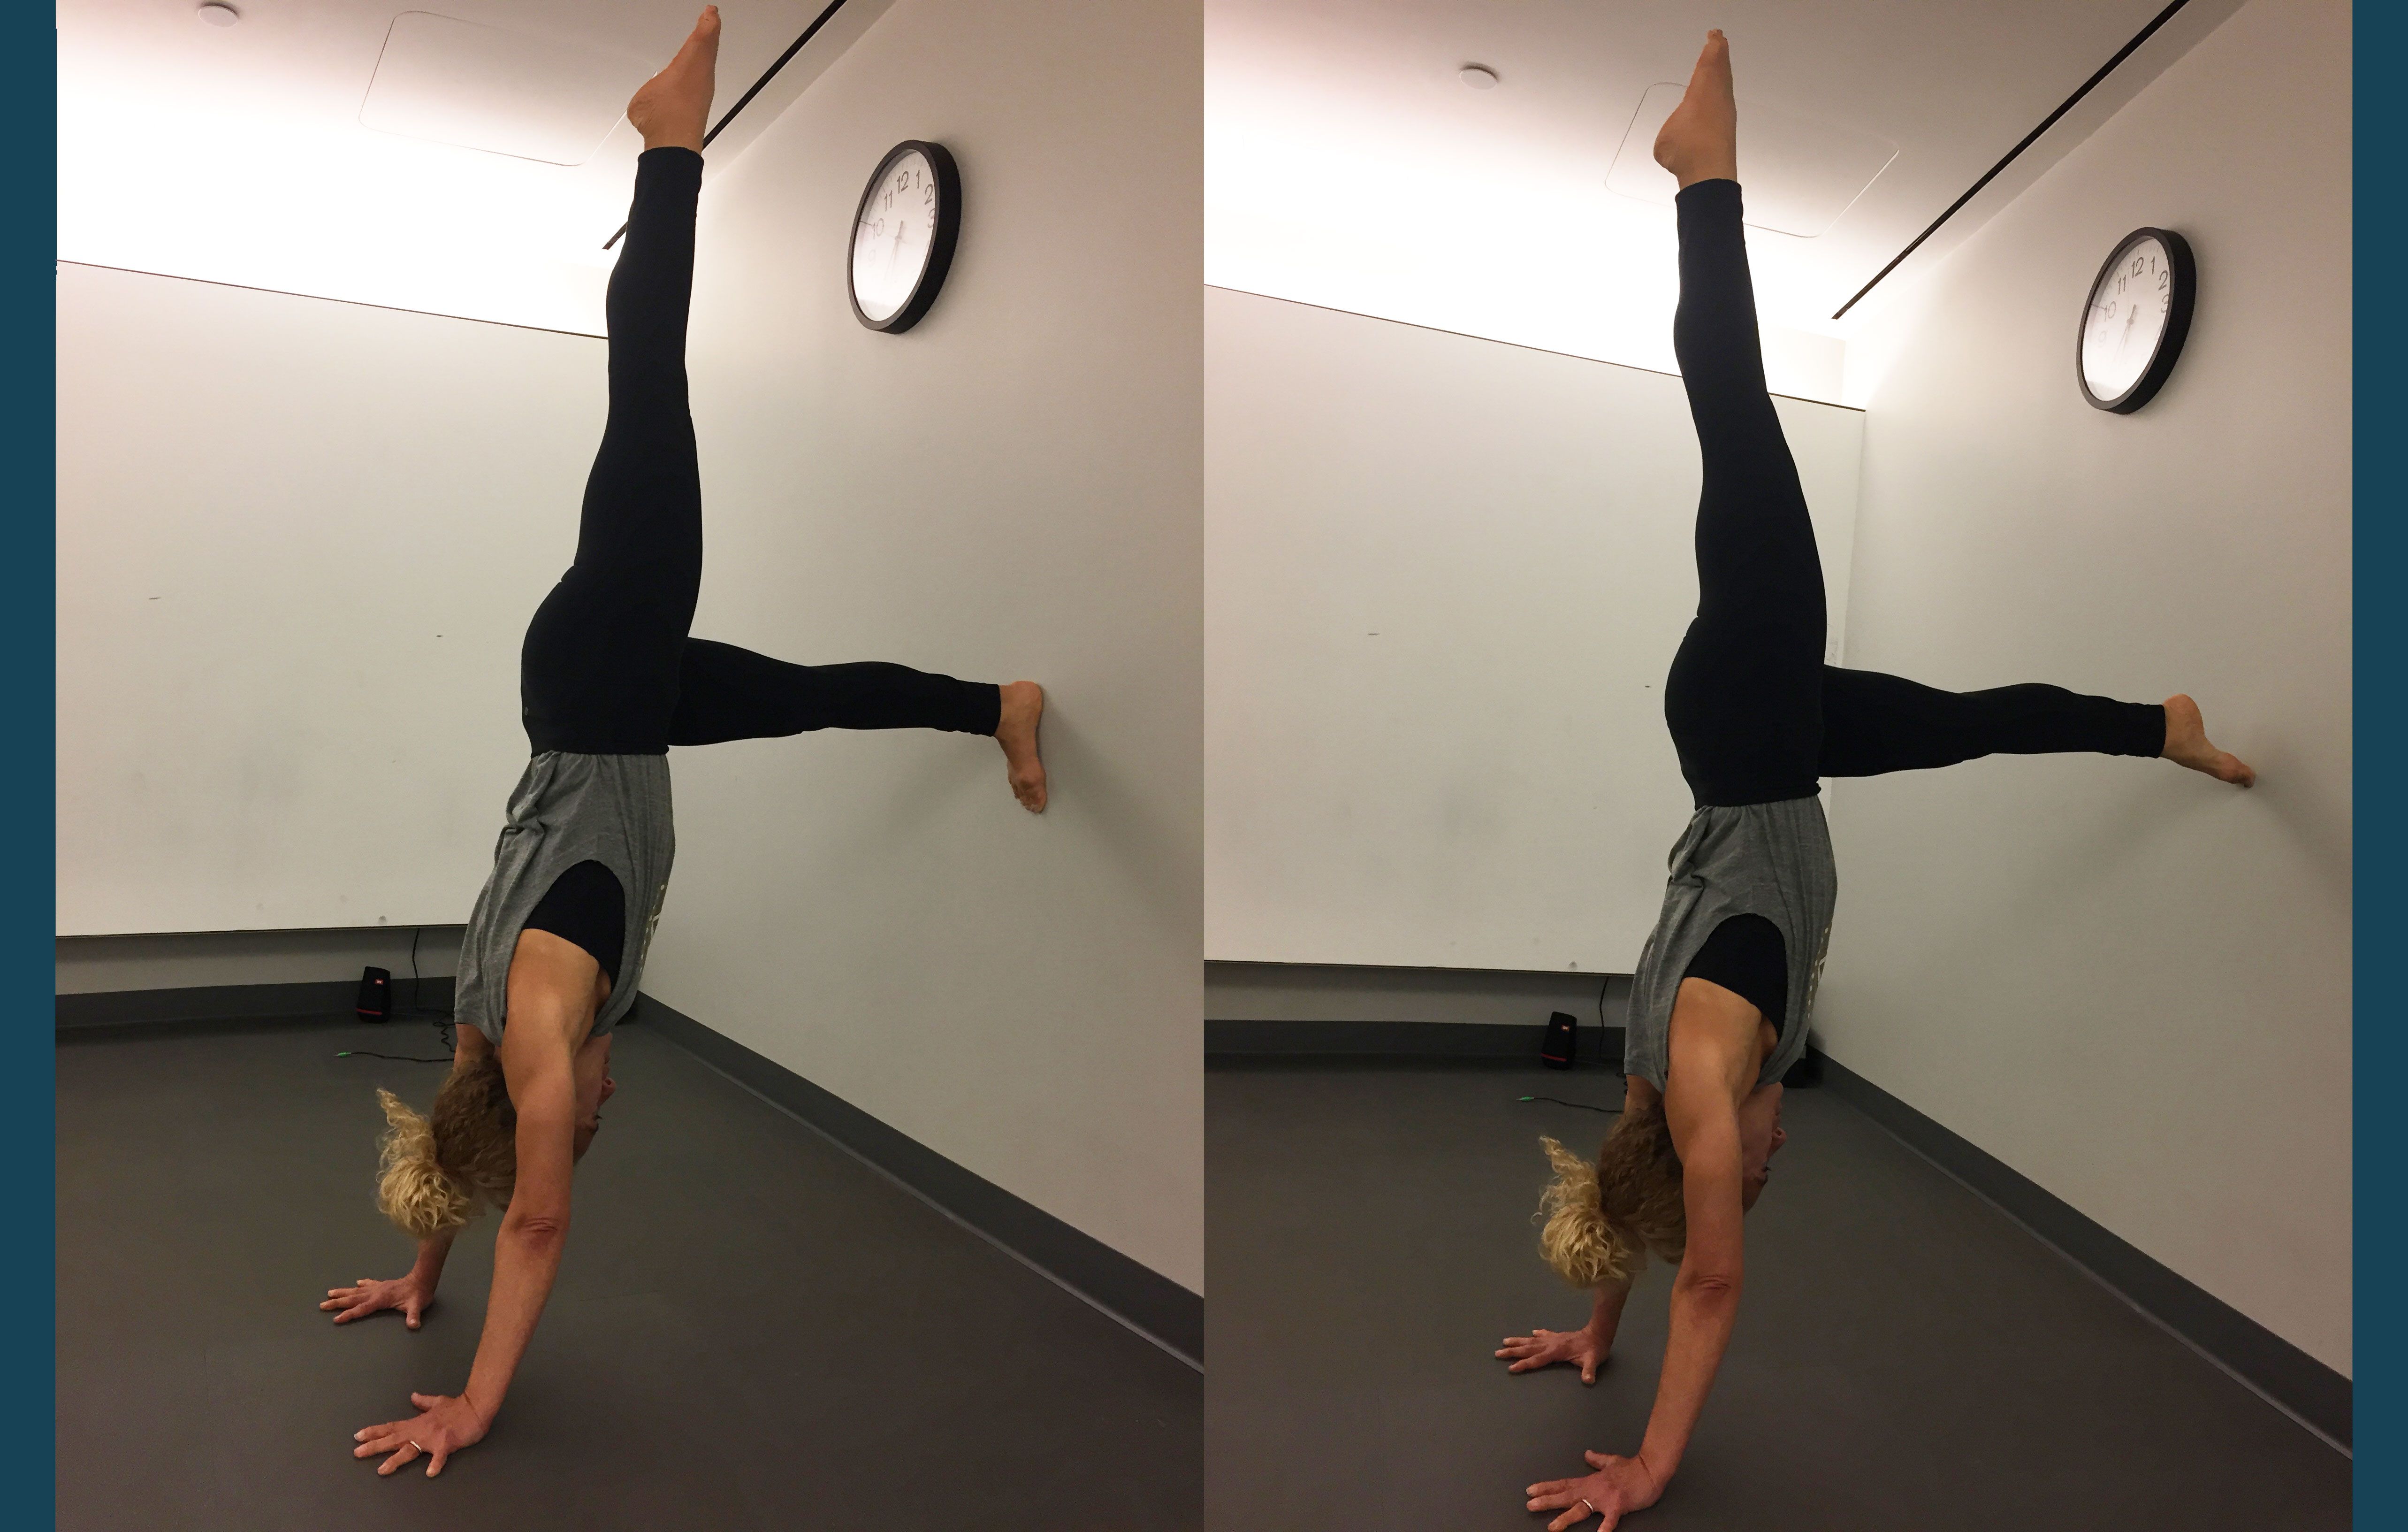
Step 5
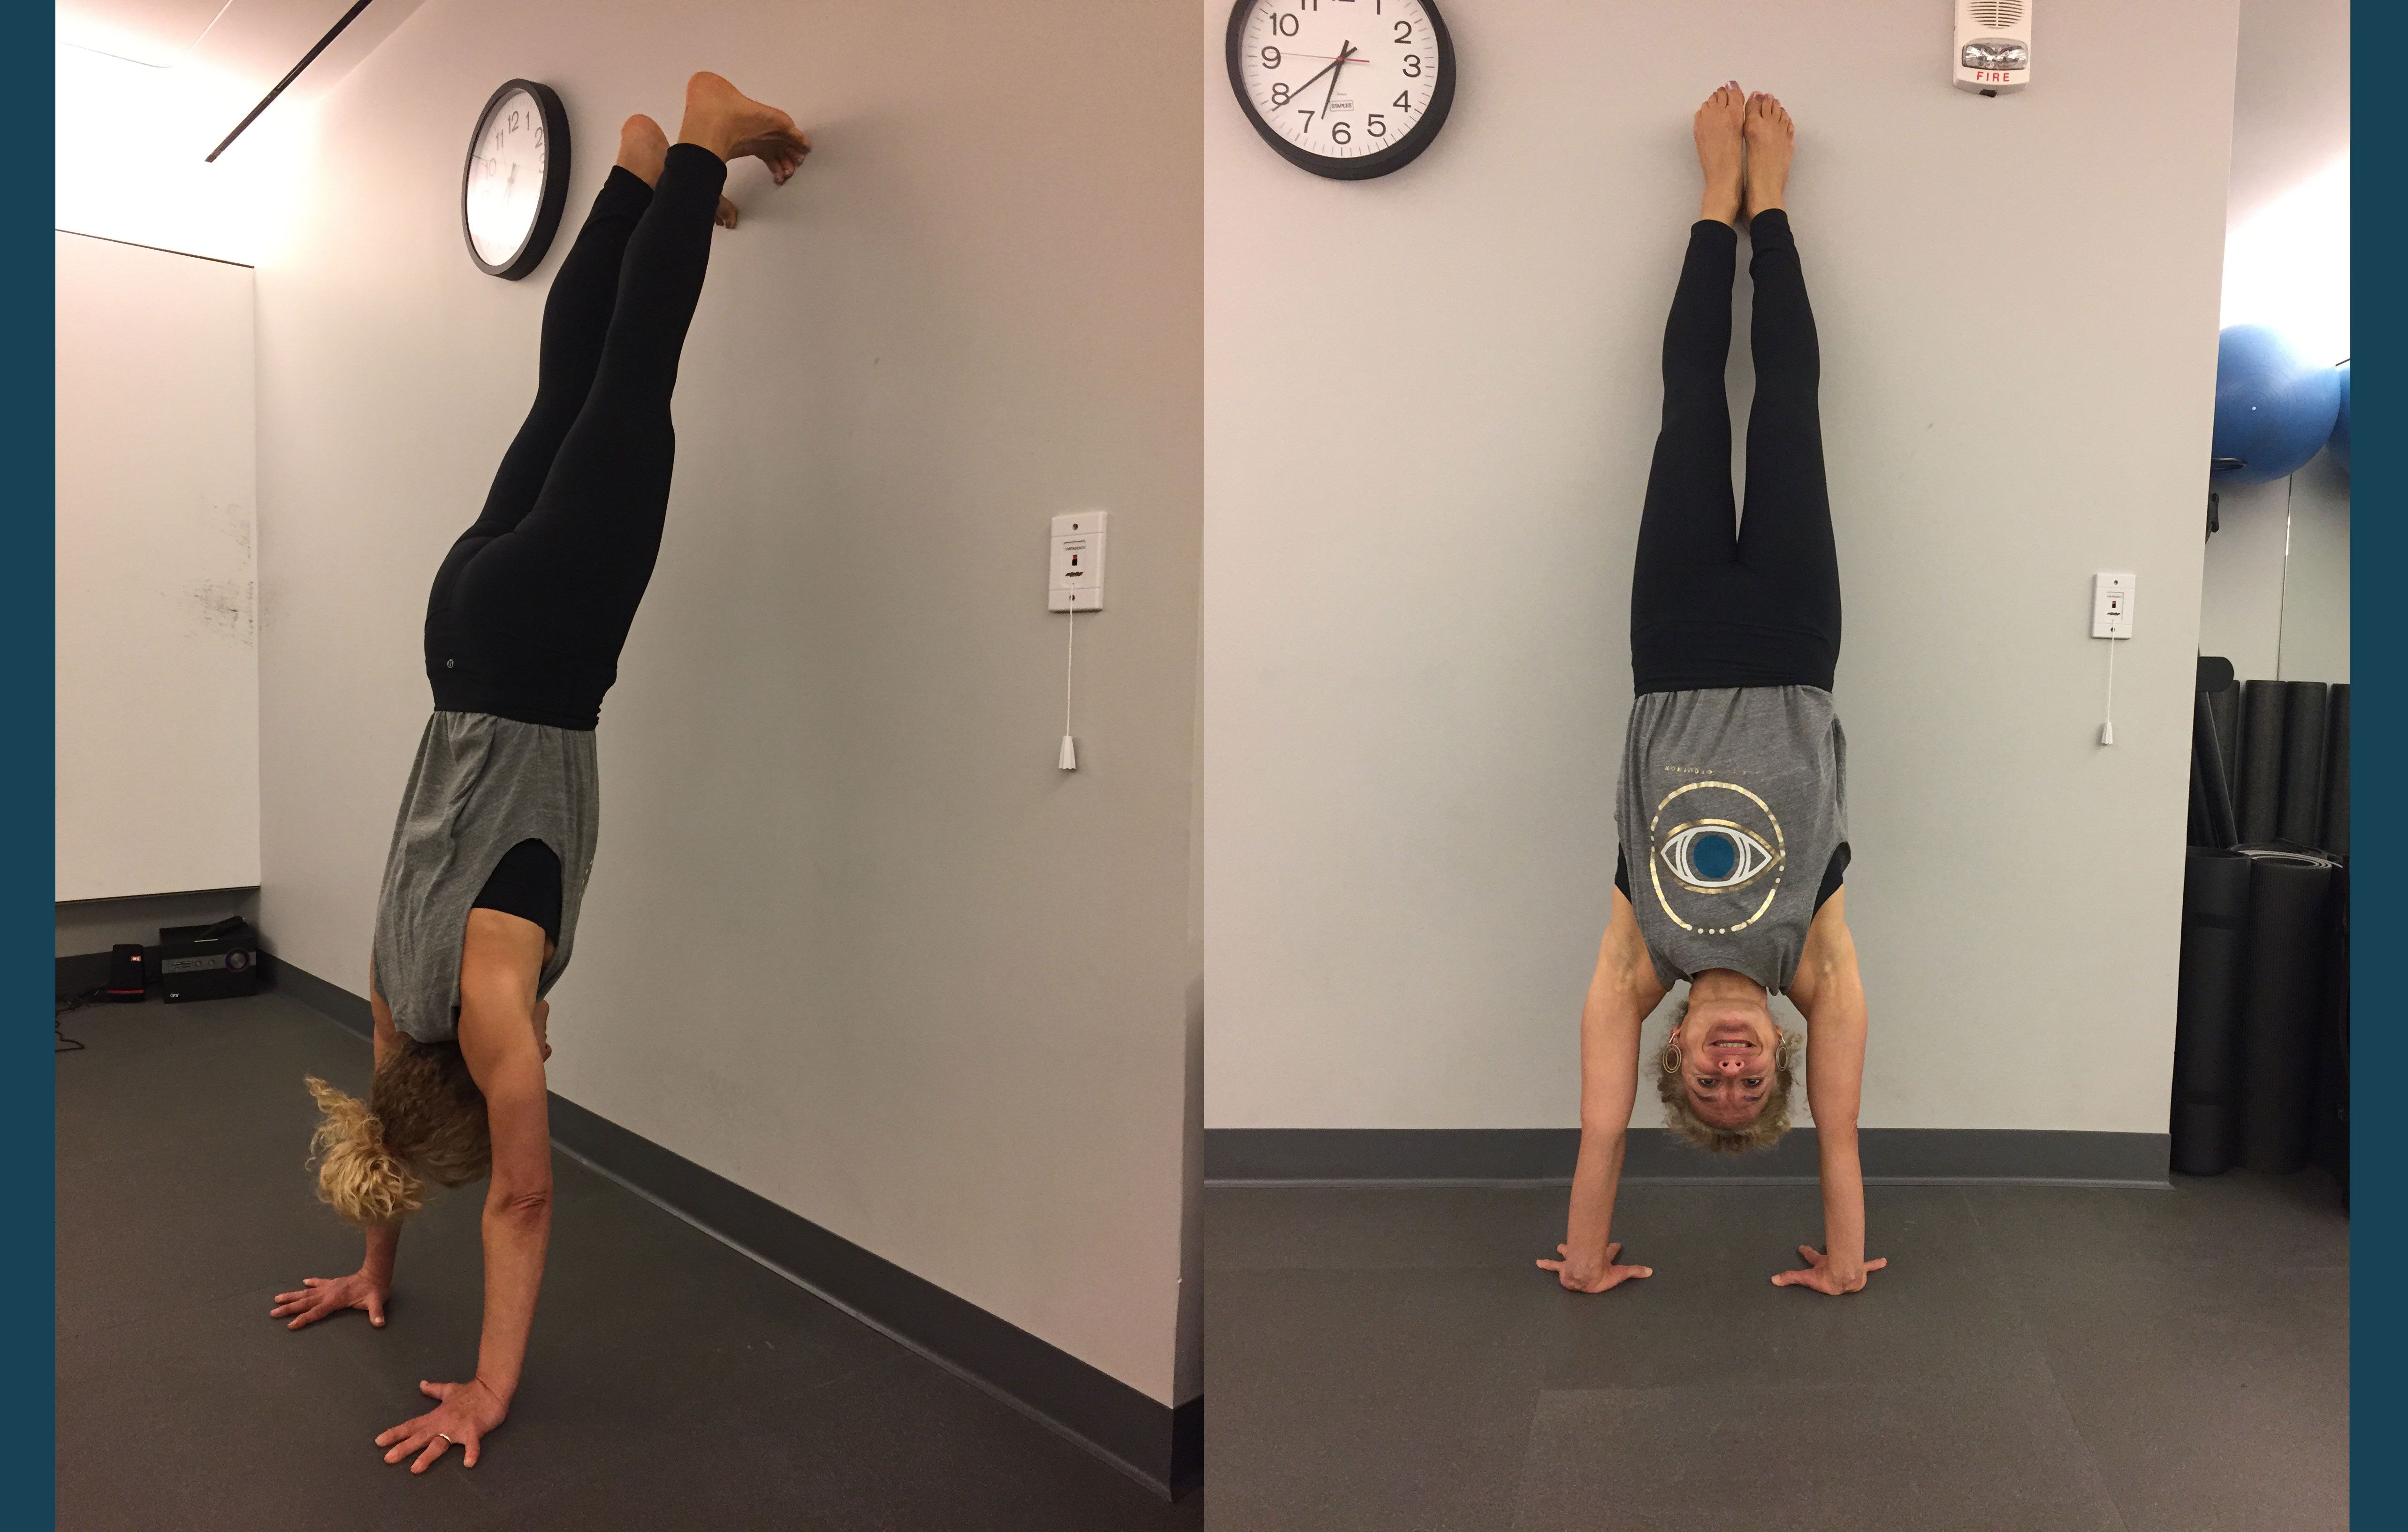
Once you feel comfortable with one leg off the wall, it’s time to move on to the next challenge. Extend both legs long and straight, with toes resting against the wall. You can either hold this pose for more practice, or, when you’re ready, gently kick off that wall. The first time you do this, you may want to get an extra set of eyes (or hands) to help you out. Also, make sure the room is clear of furniture, just in case. If you feel unstable, just reach your feet back toward the wall.
Once you nail your handstand, practice gracefully falling out of it. One method is to try bending your knees and turning your fall into a cartwheel, Zaki says.
How often should I handstand? It’s up to you, but Zaki aims to do 10 reps daily.
Avoid These Common Handstand Mistakes
Common mistake: Having your hands too far apart
Fix it: Keep them shoulder-distance apart. Think: Invert your plank pose!
Common mistake: Exhaling as you kick up
Fix it: Exhaling gives you power, which could cause you to tip over. To feel more in control, inhale, on your way up, hold your breath, then exhale once you’re in position.
Common mistake: Not engaging the key muscles
Fix it: Push away from the ground by contracting your core and your thighs. Think about reaching your toes up and through the ceiling. Pro tip: If you have a buddy, ask them to put their hand between your knees when you get in position then think about squeezing their hand to help you engage the leg muscles.
Source: Read Full Article